

A plumbing disaster rarely announces itself with a gentle, polite drip. More often, it arrives with violent immediacy: an aging washing machine hose tears open on a second floor, an uninsulated copper pipe ruptures during a brutal January cold snap, or a failed water heater valve suddenly vents scalding water into a finished basement. When pressurized water escapes its mechanical boundaries inside a home, the destruction is measured in minutes, not hours.
Despite this vulnerability, a startling number of homeowners, renters, and property managers have no idea where their primary shut-off valve is located. Even fewer know whether their valve will actually turn if tested. Searching for a valve in the middle of a deluge—in the dark, under high stress, and while watching thousands of dollars in flooring and drywall dissolve—is a recipe for catastrophic property loss. Locating, testing, and tagging your main water shut-off valve is the single most valuable preventative task you can accomplish today.
The Brutal Physics of Uncontrolled Water Damage
Residential plumbing systems do not merely hold water; they hold it under significant hydrostatic pressure, typically between 40 and 80 pounds per square inch. Under that kind of force, an unrestricted half-inch supply line break can release between 8 and 15 gallons of water every minute.
Within five minutes of a pipe failure, roughly 50 gallons of water will saturate your carpets, subflooring, and ceiling joists. Within fifteen minutes, more than 150 gallons will migrate behind wall cavities, soak into baseboards, and penetrate electrical fixtures. In less than an hour, the volume matches that of several standard swimming pools draining directly into your living space.
The direct financial fallout from indoor flooding extends far beyond the cost of repairing the ruptured pipe itself:
-
Structural degradation: Modern engineered wood, laminate, and drywall act as hydro-sponges. Once saturated, drywall loses its structural integrity and collapses, while subflooring swells, warps, and separates from framing nails.
-
Electrical and fire hazards: Water traveling down interior wall cavities easily enters junction boxes, outlets, and panel components, creating immediate electrocution hazards and short circuits that can spark electrical fires.
-
Rapid microbial colonization: Mold and mildew spores begin germinating within 24 to 48 hours in damp cellulose materials. Remediation often requires stripping walls down to the bare studs and running commercial dehumidification equipment for weeks.
-
Insurance disputes and depreciation: Even with comprehensive homeowner policies, water damage claims carry high deductibles, potential premium increases, and the permanent loss of sentimental, irreplaceable personal possessions.
Stopping the flow at the source in thirty seconds versus thirty minutes is the difference between a minor cleanup with towels and a major structural reconstruction project that displaces your family for months.
Why Fixture Shut-Offs Are Not a Guarantee
Many homeowners operate under the mistaken belief that they can always rely on the local stop valves—the small oval handles situated under kitchen sinks or behind toilets. While these fixture isolation valves are useful for swapping out a faucet or rebuilding a toilet tank, they cannot be counted on in an emergency.
First, local shut-off valves frequently freeze in place due to years of mineral accumulation and galvanic corrosion. Attempting to force a brittle, decades-old plastic or stamped brass handle during a panic can snap the stem entirely, turning a minor leak into a two-directional spray.
Second, major plumbing failures often occur upstream of local shut-offs. Frozen pipes in attic spaces, ruptured riser lines inside walls, main distribution line failures in basements, and cracked water heater tanks bypass local isolation valves entirely. When the primary line is compromised, the only mechanism on earth that will stop the flood is the main water shut-off valve.
Where to Find Your Main Water Shut-Off Valve
Water infrastructure varies significantly depending on your home’s architectural design, regional climate, and whether you are supplied by a municipal utility or a private well.
Basements and Crawl Spaces
In colder regions of the country, building codes mandate that water lines enter the home deep beneath the winter frost line. In these homes, the main shut-off is almost universally located indoors near the perimeter foundation.
Walk to the basement or crawl space wall facing the street or municipal supply easement. Look low, near the floor, where a heavy copper, galvanized steel, or PEX pipe emerges through the concrete foundation wall or the slab. The shut-off valve is typically positioned right before or immediately following the water meter and pressure-reducing valve.
Slab-on-Grade Foundations
In warmer climates and newer suburban constructions where homes lack basements, the main line often enters through the concrete slab on the ground level. Common indoor locations include:
-
The mechanical room or utility closet housing the water heater and furnace.
-
An interior corner of an attached garage, often protected inside a recessed wall cavity with an access panel.
-
A utility or laundry room near the front or side exterior wall.
If you cannot find an interior valve in a slab home, check the exterior wall directly outside your garage or kitchen. In many southern regions, builders install an exterior brass shut-off valve on the riser pipe emerging from the ground before it enters the home’s siding.
Exterior Water Meter Pits and Curbside Boxes
If your home lacks an accessible indoor shut-off valve, your primary control point sits underground near the street or property boundary. This is the curb stop, situated inside a heavy plastic, iron, or concrete vault with a lid stamped with the word “WATER.”
Accessing an exterior meter pit requires lifting the heavy lid, which may require a pry bar or screwdriver. Inside, often buried under dirt, spiderwebs, or leaves, sits the city water meter and a heavy-duty shut-off valve. Operating this valve typically requires a specialized water meter curb key—a long, T-shaped steel tool designed to reach down into the pit and turn the brass valve head.
Homes on Private Well Systems
If your water comes from an on-site well rather than a municipal utility, your primary shut-off is positioned near the well pressure tank. Look for the pipe emerging from the ground that connects directly to the large, cylindrical pressure tank in your basement, garage, or dedicated pumphouse. The valve will be installed on the discharge manifold coming out of the pressure tank, right near the pressure switch and pressure gauge.
Identifying Your Valve Type and How to Operate It
Knowing where the valve lives is only half the battle; you must know how to operate it safely without damaging the plumbing.
Quarter-Turn Ball Valves
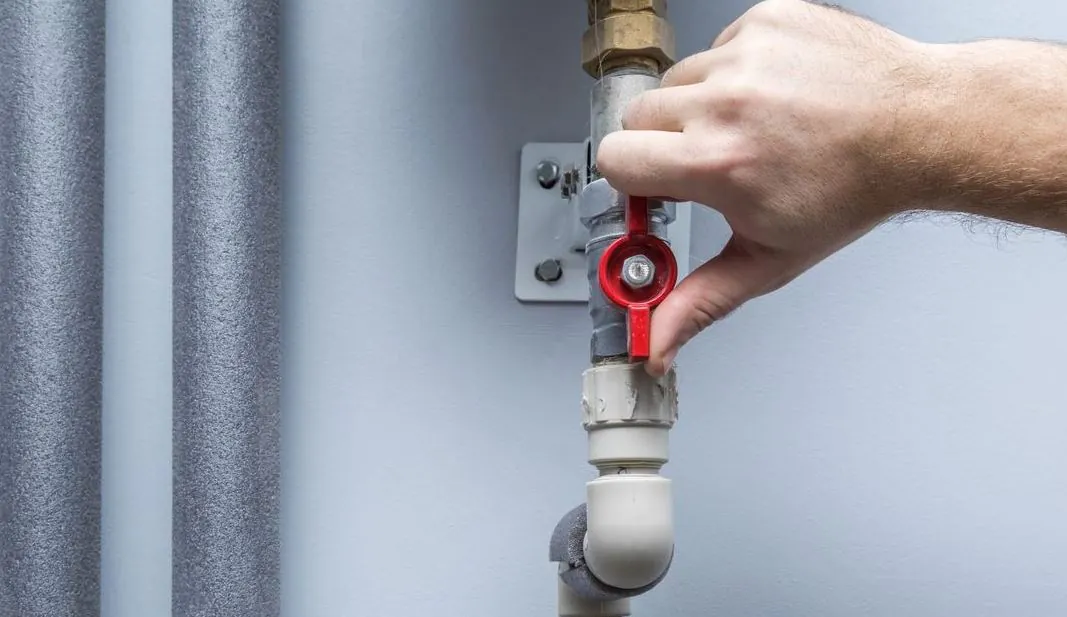
Found in modern homes and updated plumbing systems, a ball valve features a straight, lever-style handle. It is the gold standard for residential plumbing reliability.
-
When the lever is parallel to the pipe, water is flowing freely.
-
To shut off the water, rotate the lever 90 degrees perpendicular to the pipe until it stops.
The primary advantage of a ball valve is instant visual verification: if the handle forms a cross with the pipe, the water is completely off. These valves rarely seize and require minimal physical effort to operate.
Multi-Turn Gate Valves
Common in older homes, a gate valve features a round, wheel-like handle similar to an outdoor garden spigot. Inside, turning the wheel lowers a brass wedge into the path of the water to block the flow.
-
Turn the wheel clockwise to close the gate (following the standard rule: righty-tighty, lefty-loosey).
-
It typically requires multiple full rotations to seat the gate completely against the bottom of the brass valve body.
Gate valves must be handled with care. Over decades, calcium and hard water minerals build up along the threaded stem. If you wrench an old gate valve with excessive force, the internal brass stem can snap, leaving the gate dropped permanently closed or trapped wide open during an active leak.
Testing and Maintenance: Ensure It Works Before You Need It
A shut-off valve is an emergency tool, and like any mechanical safety device, it requires periodic inspection. Discovering that your valve is rusted solid while water is cascading through your ceiling is too late.
Test your main shut-off valve twice a year, ideally when you change your clocks for daylight saving time:
-
Locate the valve and turn it slowly until it reaches the fully closed position. Never use extreme leverage, such as a pipe wrench or cheater bar, on an interior residential valve.
-
Open a faucet on the highest floor and lowest floor of your home to relieve residual pressure and confirm that the flow stops completely.
-
Once confirmed, slowly open the main valve again to restore full pressure to the house. Turn gate valves until they stop open, then back them off a quarter-turn counterclockwise to prevent the handle from binding against the bonnet.
-
Check the valve stem for any small drips that might appear after movement. If the packing nut around the stem shows minor weeping, a slight quarter-turn tightening with an adjustable wrench will usually compress the packing washer and stop the drip.
If your valve will not turn under reasonable hand pressure, do not force it. Contact a licensed plumbing professional immediately to have it replaced with a modern, full-port brass ball valve. The cost of a scheduled valve replacement is trivial compared to the cost of an emergency failure.
Preparing Your Entire Household
Plumbing emergencies do not conveniently wait for the most mechanically inclined person in the house to be home. They happen when teenagers are alone, when a house sitter is watering plants, or when you are away on vacation.
Take twenty minutes today to complete these essential preparation steps:
-
Tag the valve clearly: Attach a high-visibility, waterproof tag or bright ribbon to the main shut-off handle with clear lettering that reads: “MAIN WATER SHUT-OFF.”
-
Clear the pathway: Remove storage boxes, paint cans, tools, and holiday decorations that have accumulated around the valve. Keep a three-foot clearance around the pipe at all times.
-
Keep tools nearby: If your home relies on an exterior meter pit or a stiff gate valve, store a dedicated curb key and a working flashlight in a known, easily reached spot nearby.
-
Conduct a household walkthrough: Walk every capable adult and adolescent in your home to the valve location. Have them physically place their hand on the valve and explain the direction it turns.
Taking the time to locate and test your water shut-off valve today is a five-minute investment in preventative homeownership that eliminates panic and protects your home from catastrophic water loss tomorrow.
Meta Title: Why You Should Locate Your Main Water Shut-Off Valve Today
Meta Description: Learn where to find your main water shut-off valve, how to operate ball and gate valves, and simple maintenance steps to protect your home from water damage.
Comments are closed.